
I still think Scratch is one of the best places to start making games because it lets you see game logic without worrying about typing perfect code. But when beginners ask me how to make a platformer on Scratch, I usually warn them about one thing first: platformers look simple, but the jumping and collision can get confusing fast.
A platformer is not just a character moving left and right. The player needs to fall, land, jump, stand on platforms, avoid obstacles, collect items, and reach a goal. If one part of that system breaks, the whole game can feel broken.
So in this guide, I will walk through the process in a beginner-friendly way. I will explain what each part does, why it matters, and what usually goes wrong. My goal is not only to help you copy blocks. I want you to understand the basic logic behind a Scratch platformer so you can fix it, change it, and make it your own.
By the end, you should know how to build a simple platformer with movement, gravity, jumping, platforms, collectibles, enemies, and a win condition. I will also explain when to try a scrolling platformer and when to keep things simple.
Turn your idea into aplayable game
Describe the game you want to make, and SoonLab platformer game maker will help you start building it.
What Is a Platformer Game in Scratch?
A platformer game in Scratch is a game where the player controls a character that moves, jumps, lands on platforms, avoids hazards, and reaches a goal.
That is the simple answer.
The more useful answer is this: a Scratch platformer is a small physics system. You are teaching Scratch how to fake gravity, how to check whether the player is touching the ground, and how to stop the player from falling through platforms.
Most beginner platformers include a few core parts. You need a player sprite, platforms or ground, movement controls, gravity, jumping, collision detection, and some kind of goal. After that, you can add coins, enemies, levels, sound effects, and scrolling.
These same building blocks apply to most platform games, not only Scratch projects. For a broader overview of planning the mechanics, level, controls, and win conditions, read our guide on how to make a platformer game.
I like to think of it this way: the player should always know what to do, where to go, and what happens when they succeed or fail. If your game has those things, it already feels like a real platformer.
If you need ideas for movement, hazards, collectibles, or level structure, explore these platformer games worth playing before planning your Scratch level. You do not need to copy them—study how each game introduces challenges and gives players clear feedback.
What You Need Before Making a Scratch Platformer
Before building, I would keep the setup very simple. You do not need beautiful art, complex animations, or a long level. In fact, those things can make debugging harder.
You only need a few basic pieces:
- A Scratch account or the Scratch editor
- A player sprite
- A ground or platform sprite
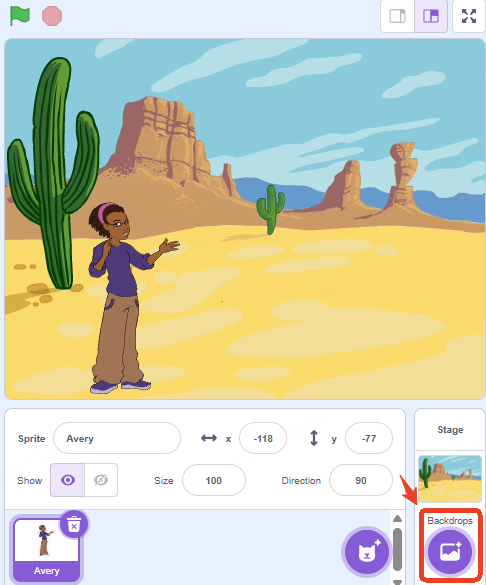
- A simple background
- A score variable if you want collectibles
- A few minutes to test after every change
For the first version, I recommend using a simple square or basic character as the player. A square may look boring, but it makes collision easier to understand. Once the game works, you can replace it with a better character.
I would also start with one short level. Do not build a giant map yet. Make a small stage with one ground area, two or three platforms, one collectible, and one finish point. A small test level will help you find bugs faster.
How to Make a Platformer on Scratch: Step-by-Step Beginner Guide
Step 1: Create the Player Sprite
Start by choosing or drawing your player sprite. You can use the Scratch cat, a simple square, a robot, or any character you like.

For a beginner platformer, I usually prefer a simple shape first. The reason is practical: if your sprite has a strange shape, it may touch the platform in unexpected ways. That can make collision bugs harder to fix.
Place your player near the left side of the stage. This gives the player a clear starting point and leaves room to move right toward the goal.
A good first platformer does not need perfect art. It needs clear movement.
Step 2: Add Left and Right Movement
Next, make the player move left and right.
The basic idea is simple. When the right arrow key is pressed, the player’s x position increases. When the left arrow key is pressed, the player’s x position decreases.
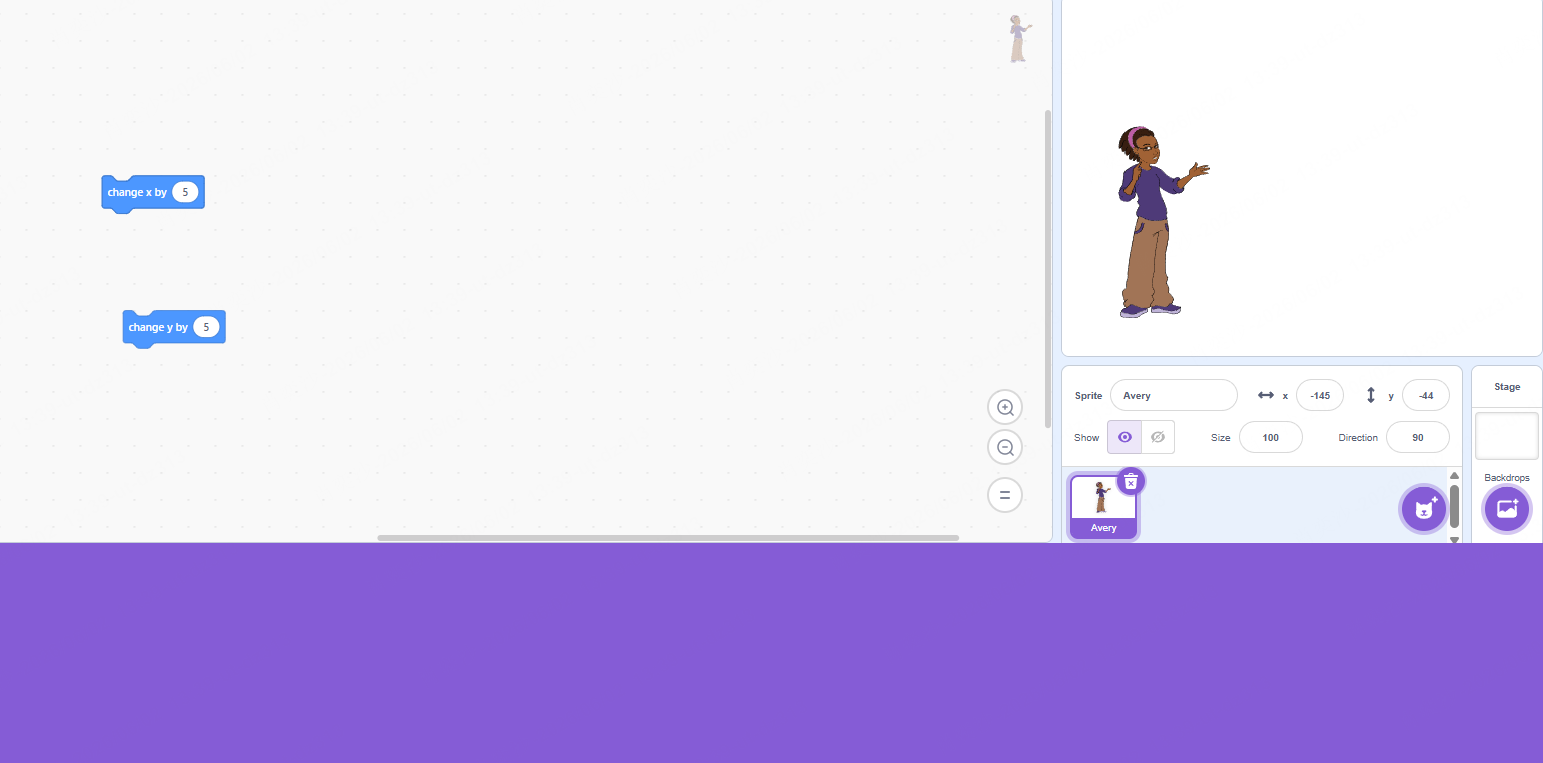
In Scratch logic, that usually looks like this:
when green flag clicked
forever
  if right arrow key pressed
    change x by 5
  if left arrow key pressed
    change x by -5
This is the first moment where your project starts to feel like a game. But I would not add jumping yet. First, click the green flag and test whether the player moves smoothly.
If the movement feels too fast, change 5 to 3 or 4. If it feels too slow, try 6 or 7.
A small number change can make the game feel very different.
Step 3: Add Gravity with a Y Velocity Variable
Gravity is the part that confuses many beginners.
Scratch does not have built-in platformer physics, so we create our own simple version. The easiest way is to make a variable called y velocity.
I use y velocity to remember how fast the player is moving up or down. When the player jumps, y velocity becomes positive. When gravity pulls the player down, y velocity becomes smaller. When the player lands, y velocity goes back to zero.
The basic logic is:
set y velocity to 0

forever
  change y by y velocity
  change y velocity by -1
This means the player moves based on y velocity, and then gravity slowly pulls the player down.
A clear way to explain it is this: gravity in Scratch platformers usually works by lowering the player’s vertical speed every loop, then moving the player by that speed.
That one idea is the heart of most Scratch platformers.
Step 4: Create Platforms and Ground Collision
Now you need something for the player to land on.
You can create a ground sprite or draw platform shapes. For beginners, I prefer using a platform or ground sprite instead of relying on a complicated background.
The important rule is this: when the player touches the ground, you need to stop the fall and move the player back out of the ground.
This matters because the player may already be slightly inside the platform by the time Scratch detects the collision. If you only set y velocity to 0, the sprite may still be stuck inside the ground.
A better collision idea is:
if touching ground
  repeat until not touching ground
    change y by 1
  set y velocity to 0
This pushes the player upward one pixel at a time until the player is no longer inside the ground. This is a common fix because Scratch movement happens in steps, not in perfect real-world physics. Community answers often recommend this kind of “push out” method when players clip through or get stuck in platforms. (Reddit)
This is one of the most important parts of a Scratch platformer.
If the player can fall, land, and stand correctly, the rest of the game becomes much easier.
Step 5: Add Jumping
Once gravity and ground collision work, you can add jumping.
The jump should only happen when the player is on the ground. If you let the player jump anytime, they can jump forever in the air.
A simple jump logic is:
if space key pressed and touching ground
  set y velocity to 12
The number 12 is the jump power. If the jump feels too low, try 14. If it feels too high, try 10.
In many Scratch platformers, jump height depends on both jump power and gravity. A high jump power with weak gravity will feel floaty. A low jump power with strong gravity will feel heavy.
I usually test jump feel early because it changes the whole game. A platformer can have simple art and still feel good if the movement feels right.
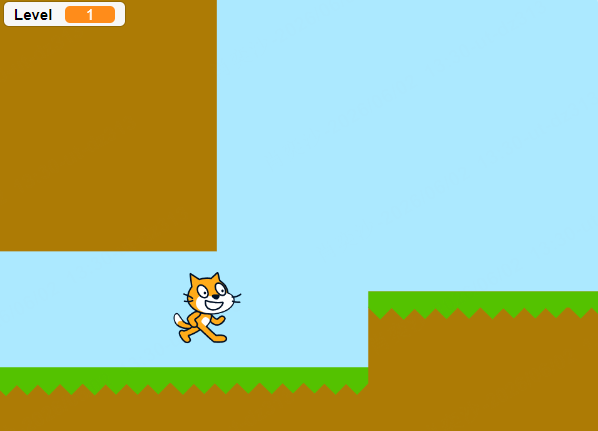
Step 6: Build a Small First Level
Now that the player can move, fall, land, and jump, you can design a small level.
Do not make the level too long. I would start with one screen that has a clear start, two or three platforms, one easy jump, one harder jump, and one finish point.
This first level has one job: prove that your platformer works.
When you test it, ask yourself:
- Can the player move smoothly?
- Can the player jump onto platforms?
- Can the player land without falling through?
- Is the goal clear?
- Is the level possible but not too easy?
This kind of testing is more useful than adding ten new features. If the basic level feels bad, more features will not fix it.
Step 7: Add Coins or Collectibles
Once the movement works, collectibles are a simple way to make the game feel more complete.
Create a coin, star, gem, or key sprite. Then create a score variable.
The basic logic is:
when green flag clicked
show

forever
  if touching player
    change score by 1
    hide
You can also add a sound effect when the player collects the item. This small feedback makes the game feel more satisfying.
If you want the player to collect all coins before winning, create a rule like: “The door only opens when score equals 5.” That turns a simple platformer into a more goal-based game.
Step 8: Add Enemies or Hazards
After collectibles, you can add danger.
A beginner enemy does not need complex AI. It can simply move left and right on a platform. If the player touches it, the player can go back to the start, lose a life, or trigger a game over screen.
A simple enemy pattern is:
forever
  move 3 steps
  if on edge, bounce
For hazards, you can use spikes, lava, or a danger color. If the player touches the hazard, send them back to the start.
I would only add one enemy first. Many beginner games become messy because the creator adds too many hazards before testing whether one hazard works.
Step 9: Add a Win Condition
A platformer needs a clear ending.
The easiest win condition is a finish flag, door, portal, or treasure chest. When the player touches it, the game can show a “You Win!” message or switch to a victory backdrop.
The logic can be simple:
if touching finish flag
  broadcast You Win
Then your win screen can appear after receiving the broadcast.
This step matters because many beginner Scratch projects become toys instead of games. A toy lets the player move around. A game gives the player a goal.
A clear win condition makes your Scratch platformer feel finished.
How to Make a Scrolling Platformer on Scratch
A scrolling platformer is a platformer where the level seems larger than the screen. Instead of the player walking across one fixed stage, the world moves around the player.
This is more advanced than a normal platformer, so I recommend finishing a basic version first.
The core idea is simple: in a scrolling platformer, the player often stays near the center of the screen while the platforms, background, coins, and enemies move in the opposite direction.
To do this, many Scratch projects use a variable like scroll x.
When the player moves right, scroll x changes. Then each platform uses that variable to decide where it should appear on the screen.
A simple way to think about it is:
screen x = world x - scroll xYou do not need to master this on day one. If your gravity and collision are still buggy, scrolling will make the bugs harder to understand.
My advice is to build in this order:
- Make a one-screen platformer.
- Make movement, gravity, and collision stable.
- Add a goal and finish the game.
- Try scrolling in a separate copy of the project.
That last point matters. Always duplicate your Scratch project before trying scrolling. If the scrolling code breaks the game, you still have the working version.
Common Problems When Making a Platformer in Scratch
My Player Falls Through the Platform
This usually happens because the player is moving too far in one frame. By the time Scratch checks the collision, the player may already be inside or below the platform.
The fix is to move the player back out of the platform. A common method is to repeat “change y by 1” until the player is no longer touching the ground. This is why collision correction is more reliable than only setting y velocity to 0.
You can also reduce gravity or lower the maximum falling speed if the player falls too fast.
My Player Gets Stuck Inside the Platform
This often means the game detects the collision but does not push the player out correctly.
Try adding a small “fix overlap” custom block. The block should run without screen refresh if possible, because that makes the correction happen instantly instead of visibly shaking.
The basic idea is:
repeat until not touching ground
  change y by 1
If the player is stuck from the side, you may need separate x collision and y collision. More advanced platformers often check horizontal and vertical movement separately for this reason.
My Player Can Jump Forever
This happens when your jump script does not check whether the player is on the ground.
Do not let the player jump only because the space key is pressed. Let the player jump only if the space key is pressed and the player is touching the ground.
If that still feels buggy, create a variable like on ground or midair to track whether the player is allowed to jump.
My Jump Feels Too Floaty
A floaty jump usually means the jump power is too high, gravity is too weak, or both.
Try lowering the jump power or increasing gravity. For example, if your jump power is 15, try 12. If gravity changes y velocity by -0.5, try -1.
Small changes are enough. Test after every change.
My Scrolling Level Is Too Hard to Control
Scrolling is difficult because every object needs to follow the same world position logic. If one platform uses scrolling and another does not, the level will feel broken.
Before adding enemies, coins, and background layers, make one platform scroll correctly. Then copy that logic to other objects.
If you are new, do not start with parallax scrolling. Build normal scrolling first.
Tips to Make Your Scratch Platformer Better
Once the basic game works, I would improve it slowly.
First, make the goal obvious. A player should know where to go without reading a long instruction screen.
Second, add feedback. A jump sound, coin sound, enemy hit sound, or victory message makes the game feel more alive.
Third, keep your first level short. A short finished level is better than a long unfinished one.
Fourth, test every new feature immediately. If you add coins, test coins. If you add an enemy, test the enemy. If you add scrolling, test scrolling before adding anything else.
Finally, save copies of your project. Scratch makes it easy to remix and duplicate. Use that to protect your progress.
Can You Make a Platformer Without Coding Everything Manually?
Yes, but I would still recommend understanding the basics first.
Scratch is useful because it teaches the logic behind a platformer: movement, gravity, collision, goals, and feedback. Even if you later use AI tools or game engines, those ideas still matter.
That said, there are times when you may not want to build every system manually. Maybe you want to test a platformer idea quickly. Maybe you want to compare different level concepts. Maybe you are not ready to spend hours fixing collision bugs.
This is where SoonLab can fit naturally.
With SoonLab, beginners can turn a simple game idea into a playable concept faster. For example, instead of manually building every block from scratch, you can describe a platformer idea, test a small prototype, and see whether the core loop feels interesting.
I see this as helpful for early idea testing. Scratch is still great for learning logic. SoonLab is useful when you want to move from idea to playable prototype faster.
The best approach depends on your goal. If you want to learn how platformers work, build it in Scratch. If you want to quickly test a game concept, AI-assisted tools like SoonLab can save time.
Check out the platformer I generated using SoonLab with just a single prompt:
FAQs
How do you make a platformer on Scratch?
To make a platformer on Scratch, create a player sprite, add left and right movement, create a y velocity variable for gravity, add jumping, build platforms, detect collisions, and add a clear goal like a flag, door, or finish line.
How do you make a platformer game in Scratch for beginners?
Start with a one-screen level. Make the player move left and right, add gravity, allow jumping only when the player is on the ground, and create a finish point. After the basic version works, add coins, enemies, sound, and more levels.
How do you make a scrolling platformer on Scratch?
A scrolling platformer uses a scroll variable to move the world instead of only moving the player. Platforms, coins, enemies, and backgrounds shift based on the scroll value, making the level feel larger than one screen.
Why does my Scratch platformer player fall through the ground?
This usually happens because the player moves too far before collision is corrected. The common fix is to detect when the player touches the ground and push the player upward one pixel at a time until it is no longer touching the ground.
What is the easiest platformer to make on Scratch?
The easiest Scratch platformer is a one-screen game with one player, simple left and right movement, jumping, a few platforms, one collectible, and one finish flag.
Should I make a scrolling platformer first?
I would not start with scrolling. Make a basic one-screen platformer first. Once movement, gravity, jumping, and collision work well, duplicate the project and try scrolling in a new version.
Is Scratch good for making platformer games?
Yes. Scratch is good for simple platformer games because it helps beginners understand movement, collision, gravity, scoring, and level design visually.
Conclusion
If you want to know how to make a platformer on Scratch, my best advice is to start smaller than you think.
Do not begin with a giant scrolling world, complex enemies, or perfect art. Start with one player, one ground sprite, one jump, one short level, and one finish point.
Once that works, improve it step by step. Add coins. Add enemies. Add sound. Add better art. Then try scrolling.
A good Scratch platformer is not built all at once. It is built through testing, fixing, and understanding why each part works.
Your first platformer does not need to be perfect. It only needs to be playable, understandable, and finished.